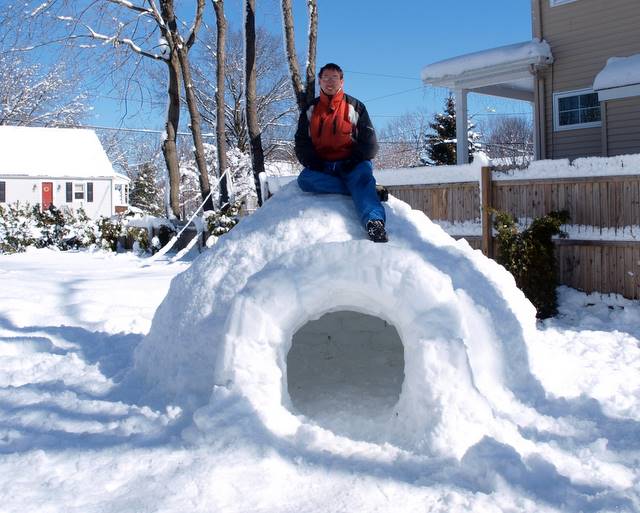
We had a lot of snow the last few days, so I decided to build an igloo, and in the process create a time-lapse video of the entire igloo build. The igloo turned out really well. The time-lapse video, not so much.

Unfortunately my Olympus e520 doesn’t have a built-in intervalometer function, a means of taking an exposure every ‘x’-seconds. Turns out there are a lot of eBay gadgets that offer this feature, but they wouldn’t arrive in time for an igloo. Thankfully, Jens from the four-thirds forum came up with this ingenious way of combining two features the e520 does have, which provides the intervalometer function:
- Put the camera in sequential shooting mode. On the e520, use the dedicate function button on the top left, and select the option that lets you fire off many exposures in a second. Page 57 in the manual.
- Set the “Anti shock” to the interval X you need (the maximum value is 30 seconds on the E-520). This is basically a mirror-lock function, typically used to reduce the vibrations caused when the you make an exposure, and the mirror flips up. Page 60 in the manual.
Now if you have a wired remote, you can lock the button as if you were doing a Bulb exposure and the camera will make an exposure every X seconds. If you don’t have any wired remote (in my case I didn’t), you need to jerry rig something to keep the camera’s shutter button down.
There area few things to pay attention to when you do this:
- Make sure whatever jury-rigging you do to hold the shutter down works. Test it for a few minutes.
- Frame your scene before locking the shutter release down, as you won’t be able to see through the view-finder once the timer starts. (Of course, you can release the shutter and check things, but that means re-starting.)
- Use a fresh battery.
- Reduce the quality of the images. First you’ll be taking a lot of pics, so smaller is better to fit on whatever memory card you have. Second, you’ll be joining them together to make a time-lapse movie. Quality is going to go down. I used Large Normal, which on an 8Gb card would allow me to capture over 3,000 images,
- Put the camera in as fully automatic mode. Over the course of a few hours lighting conditions change. So unless you want to be continually adjusting the camera, set if to P-mode.
- I used a 30 second interval between images. You can estimate the frequency, by calculating:
- The length you want your final time-lapse video to be, in seconds. I reckon 2-3 minutes is reasonable, so 180 seconds.
- You’ll be displaying an image every 1/10 of a second (or so). So at 180 seconds, we’ll need 1800 images.
- Now estimate the total duration of the shoot in seconds. 7 hours is 7*60*60, or 25,200 seconds.
- So over 25,200 seconds we need to take 1,800 images. That’s an image every 14 seconds (25,200/1,800). I rounded up a bit and went for a 30 second interval.
Unfortunately, my jury-rigged solution for holding the shutter down, included the use of some duct tape, with a small ball of tape on the shutter release. Turns out the e520 is very resistant to duct tape, so after a while the duct tape came loose, and the shutter stopped firing just after I started. Which meant that out of a 7 hour igloo building process I only captured 3 minutes of images. Which boiled down to a 10 second video clip. As you can see, I had to take this from indoors, and due to the blizzard the window really degraded the quality of the pictures.
Next time, rather than duct tape, I’m going to use a solution recommended by another four-thirds forum member. A piece of elastic cord with something underneath to put pressure on the shutter release.
So, a failed time-lapse attempt. That just means I need to build another igloo. Take 2 coming up in a few days!