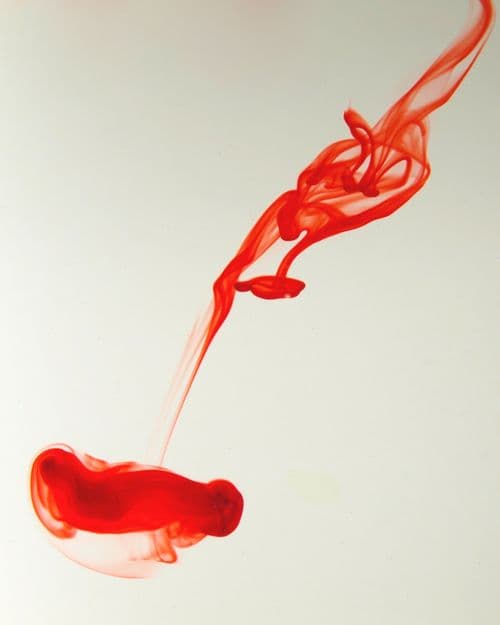
This weeks photo challenge topic was “close up”. I decided to try photographing ink dispersion in water. It took a few attempts over a couple of days to get the setup and camera settings right, but the result pretty good. A fun technique, and one I will revisit.

I learned a lot from this photo shoot, so in the interests of sharing…
Equipment
You shouldn’t need to purchase any unique equipment for this, except for some food dye, which you may already have in the kitchen.
- Wine glass. Normal wine glass.
- Jug of cold water.
- Sink, or empty bucket. Used for throwing dyed water into.
- Towels. For cleaning the glass.
- Light source. One or more flashes is ideal.
- Lightbox. It’s easy to piece one together, or just wing it. See below if you don’t have one.
- Tripod, or some form of camera stand. Pile of books would work at a pinch.
- Camera. And some sort of lens.
- Depth of Field calculator. I prefer DoF Calculator, but there are many others, and for many platforms.
Camera Settings
Depth of field is the primary challenge. Depending on your lens you going to have a pretty thin DoF. In my case, I started shooting at 60mm, from about 8 inches, which even at f22 resulted in a 0.216" DoF. Far too thin. I ended up using a longer range lens at 145mm, 3 feet away, at f22, with a 0.894" DoF – about half the diameter of the glass, but generally enough for most of the ink dispersion. Your DoF Calculator will take the guess work out of camera settings.
- f22: The goal is to overexpose the background, since we want white. We also need a good DoF. So shoot with the highest f-stop you can whilst getting sharp images. Generally depends on your camera and lens.
- Manual Focus: Experiment with manual and auto-focus. Manual worked out better, but auto-focus can be handy if you can move the camera slightly on the tripod to focus specific patterns. Pre-focusing is easier if you replace the glass with a book.
- ISO100: You’ll be cropping the image, so go as low ISO as your camera can handle, in the light you have.
- RAW: If you can, shoot RAW, as it’s easier to adjust to get a white background. I shot JPG because I wanted to be able to shoot quick, and RAW images are a little big for quick storage on my relatively slow CF card.
- "+3’‘’: Use a few stops of exposure compensation, again to get as white as you can. A few stops should be enough – any more and you’ll just add noise.
- Saturation: Colors are the key here, so turn up the saturation a little if you can.
- Stabilization off: You’re on a tripod or support, so generally turn off camera/lens stabilization.
- Continuous: Shoot with as many frames per second as you can. Ink falls quick, so multiple exposures is the key to retaining sanity.
- If you have it use a remote shutter. Not critical, and I managed without. Just easier.
- Turn off any shadow compensation modes.
Lighting
The goal here is to overexpose the white background, and to reflect the light off the background through the glass to the camera. That means you want lighting on the background not the glass.
- Doing this in a dark room is best, as it reduces reflections on the glass that you’ll then need to remove post-production.
- If you have a flash move it close to the background and close to the glass.
- Point your flash directly at the background, not at an angle.
- Finally, my E3 requires the on-camera flash to function when using a remote flash. This caused light reflections in the glass. To avoid that I taped some paper over the camera flash.
- Get the glass as close to the background as you can, without having the background in focus. That helps maximize the light coming through.
Setup: The First Try
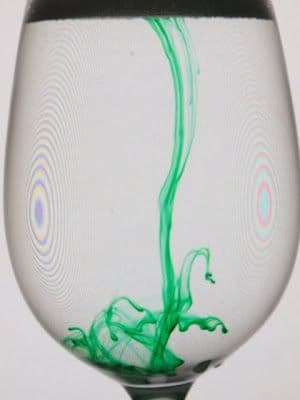
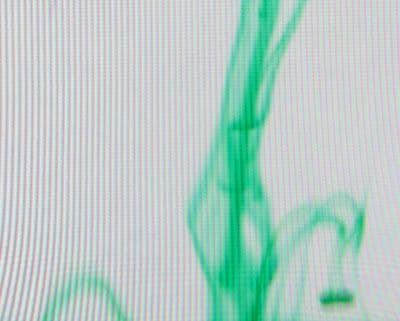
For my first attempts I had the idea of using my monitor as a light source, and as the white background. This seemed to be going pretty well. Unfortunately even though I checked the images periodically through the process, the moire artifacts on the glass were pretty harsh once viewed from the computer.

That and the fact that the water and glass magnified the monitor pixels put this great idea in the lessons learned bucket. I did try putting some tissue over the monitor to reduce the pixel effect, and it worked but reduced the light source too much.

Setup: Second Time Lucky
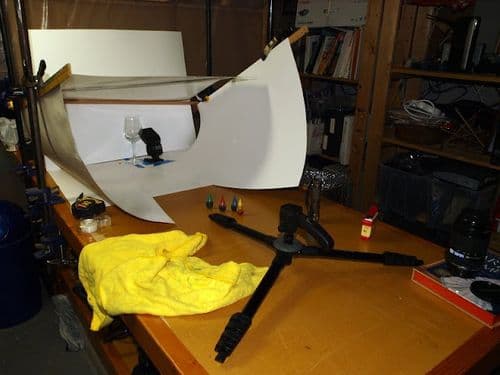
In the end I botched together a ‘light box’, surrounding the glass with a box of white construction paper, in an attempt to maximize the light from the single flash I had.

- You’ll be refilling the glass a lot, so have a jug of water at hand, away from the camera. Have an empty bucket near the jug. Have a towel at hand to clean the glass regularly.
- Mark the glass position so you have consistency between refills.
Things to know
- Before you drop ink, photograph the glass of water, to ensure you have the background overexposed, minimal shadow, and even background color cast.
- Try different water temperatures. Wamer water causes broader ink dispersion patterns which are neat, but the ink disperses quicker making it a little tougher to capture. Cold water reduces dispersion somewhat (more stringy), but is slower, and thus easier to capture.
- You’re probably going to need to crop the result, so get as close to the glass as you can based on you lens capabilities, and then zoom to fill the frame with the width of the glass.
- Drop the ink close to the surface. Then it’s falling slower, making it easier to capture.
- Slow things down: Put some dish washing soap into the glass, so you end up with a 1/2 inch layer of bubbles. When you drop the ink on the bubbles, you’ll have a little more time to get ready to take pictures. The ink also falls slower, and it’s falling from a lower height.
- Don’t fill the glass from the faucet, as this leads to bubbles on the inside surface of the glass, which are a pain. Use a jug of water, and pour in fairly slowly.
- Typically one drop at a time is enough. Try doing a couple though for a more vivid color.
Next Time
I’ll probably revisit the monitor as a light source idea. Putting paper over the monitor will remove the pixel effect. Supplement with a flash, and it should form a really nice white background.
The End Result
Some post processing was needed. Removing dust particles, and making the background lighting even, and white mostly.

